A few weeks ago, Craft A Brew generously set me one of their one-gallon starter kits [**]. For those unfamiliar, Craft A Brew makes homebrewing starter kits and extract-based recipe kits, ranging from 1-3 gallon batches, providing new homebrewers with all of the equipment and ingredients necessary to start their first batch of homebrew. With several types of recipes available, I chose the brown ale kit since I haven’t brewed any style of brown ale in quite awhile. Below details my brew day experience with the Craft A Brew kit as well as briefly discusses the kit recipe (from what I can guess of it). Once fermentation and bottle conditioning is complete, I’ll provide tasting notes in a future blog post. Additionally, when the brew goes full circle, I’ll provide a detailed product review of the Craft A Brew one-gallon starter kit with emphasis in apartment brewing. Now, onto the brew day! Cheers, and happy brewing!
Brew Day & Fermentation
 There are many ways to brew an extract beer, and because of this, might be confusing to a new homebrewer looking for a one-way process. As such, I thought I would detail my brew day process and activities as opposed to instruct “step-by-step” on how to brew. In particular, Craft A Brew provides fairly good instructions on how to brew with their kit. Additionally, there are many great homebrew learning sources, especially How to Brew by John Palmer. Hopefully, the information from this blog post can provide one data point in the formulation of a brewing process.
Starting out of the box, the Craft A Brew brown ale kit calls for a speciality grain steep and 60 minute boil. In doing so, I heated 1 gallon of distilled water to 165 F and steeped the speciality grains for 15 minutes. Living in Austin, where the tap water pH is very high at 9.6, I was worried that the grain steep would extract too many tannins, therefore used distilled water in replacement. Brewers living in areas with soft water can replace the distilled water with tap water. After the steep, I removed the spent grains and topped off the wort with 1/2 gallon of tap water to add some minerals for fermentation. Also, the tap water was treated with potassium metabisulfite to remove any chloramines.
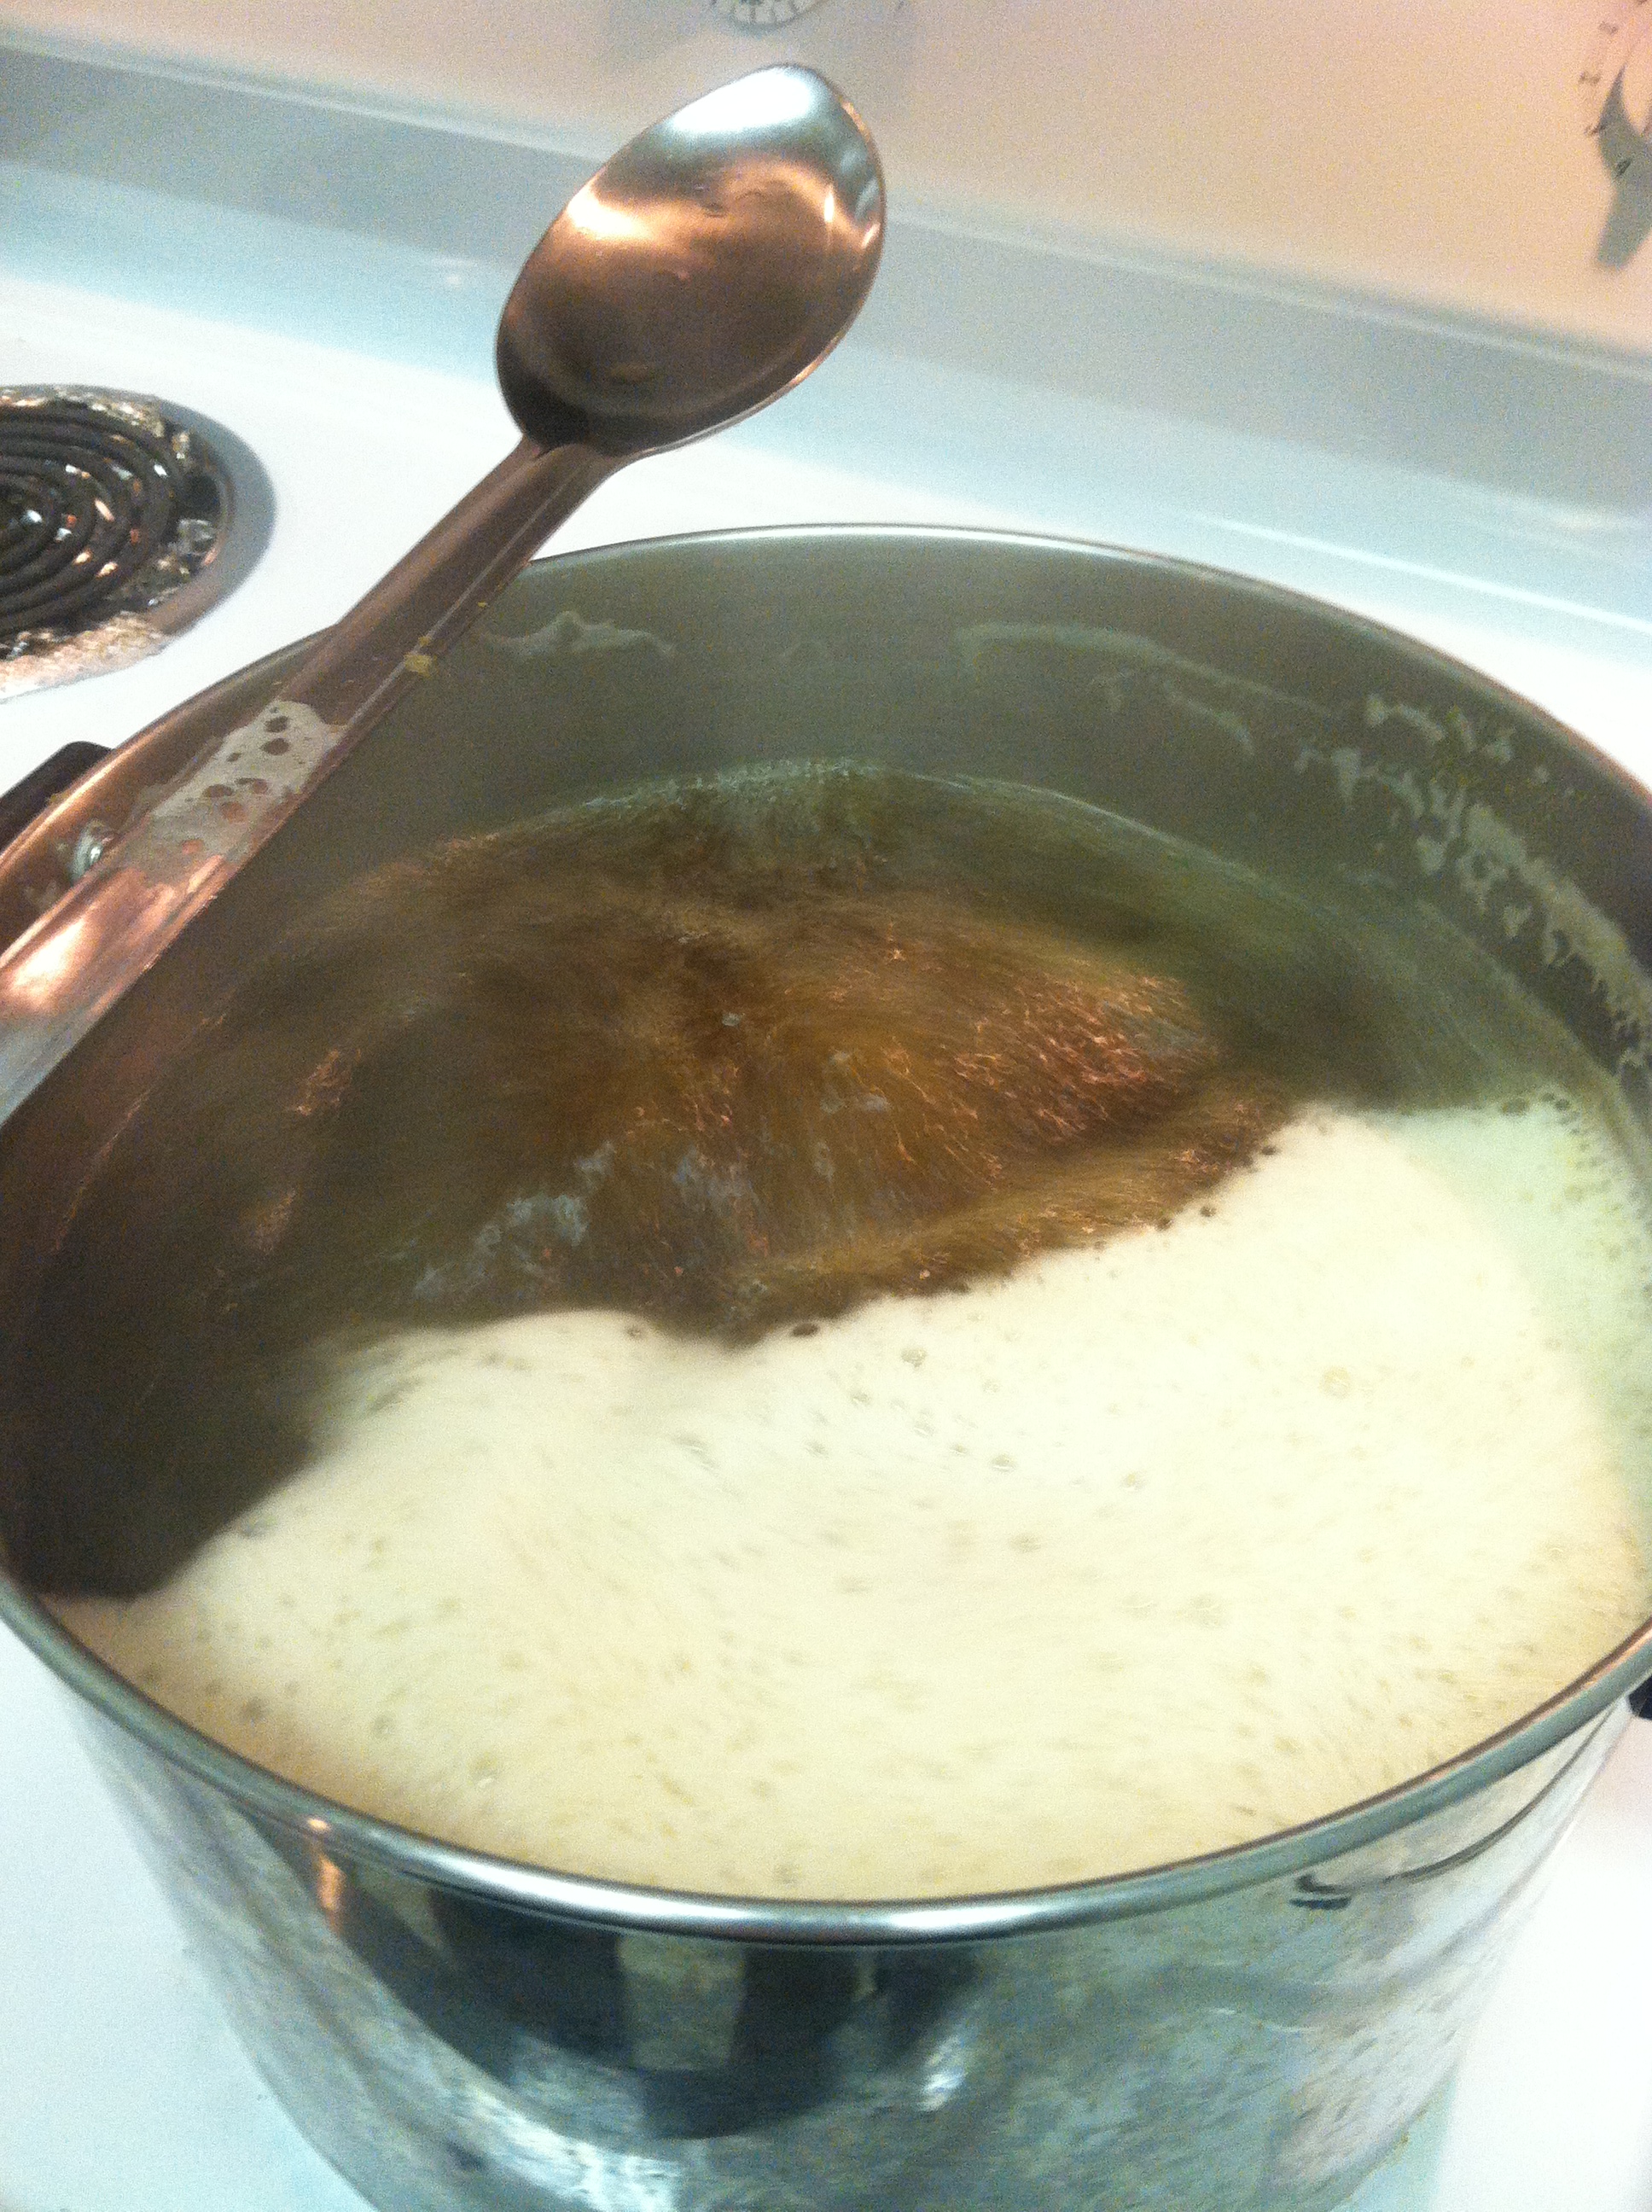 With the kettle volume at ~1.5 gallons, I chose to do a full volume boil (as opposed to a partial boil) to avoid any kettle caramelization and wort darkening. Also, I added half the DME at the 60 minute mark to get better hop utilization. At the 15 minute mark, the second half of the DME was added to the boil. It is noted that while the DME was added to the kettle, the stove top power was off (only briefly) to prevent DME burning/scorching.
After the boil, the wort was chilled using a small ice bath taking around 15 minutes total. While chilling, I cleaned and sanitized the one-gallon fermentor using the kit’s cleaning packet. The wort was transfer via racking cane and the yeast aerated and pitched at ~65 F. Fermentation was active at 12 hours after pitching with high krausen at 24 hours. Fermentation temperatures were controlled in the mid-60s F using the t-shirt trick, an evaporative cooling technique useful in hot apartments. My apartment is 78 F during the summertime in Austin, much to warm for most ale fermentations. More information about the t-shirt trick can be found at the Beer and Wine Journal linked here. Fermentation finished 5 days after pitching.
Recipe Design
 As a starter kit, Craft A Brew comes with pre-built homebrew recipes as well as refills, much like Mr. Beer. From the Craft A Brew website, the brown ale recipe description discloses the grist as Pilsen DME and speciality grains consisting of Special B, Crystal 80L and Chocolate malt. In the hops department, only a bittering addition of Fuggles were used. Lastly, the beer was fermented with Munton’s Gold yeast strain. I’ve never used this dry yeast before, though I have read many good reviews. Once fermented and carbonated, I’ll be excited to taste this particular yeast characteristics within the brown ale style. Below is my guess at the recipe from the known information. Perhaps in the future, I might step up the recipe from a one-gallon batch to a 2.5 gallon batch pending the tasting notes. Overall, this brown ale seems pretty close to a Northern English Brown style, although any homebrewer inspired by late hopping can easily turn this one into an American/Texas Brown.
Summary
Overall, the extract-based brew day was very easy, especially when compared to some of my monster all-grain brew sessions, where stress can run high at times. Also, the Craft A Brew kit was really fun, reminding of my beginner extract brew days. At present, the brown ale has finished fermentation and will be bottled soon. Once conditioned, I’ll provide tasting notes as well as an overall product review with emphasis in apartment living conditions. Hopefully, new brewers looking to start homebrewing can use this information to gauge their path forward into the hobby. Again, many thanks to Craft A Brew for sending me this kit. Cheers, and happy brewing!
Recipe: Craft A Brew Brown Ale (my guess at it)
1 Gallon Batch, Extract + Speciality Grains
Stats: OG 1.052 FG 1.012 ABV 5.2% IBU: ~18
Grist
1.25 lb Pilsen DME
1 oz Chocolate Malt
1 oz Special B
2 oz Crystal 80 L
Speciality grains steeped in 165 F water for 15 minutes, 60 minute boil
Hops
Early boil additions of Fuggles to get you to ~18 IBUs (I did a 60 minute addition)
Yeast
1 packet of Munton’s Gold dry yeast, pitched and fermented at mid 60s F
Water
Nice clean soft-ish water (I used 1 gallon of distilled cut with 0.5 gallon of Austin water)
 [**] From the Apartment Homebrewer Legal Department (aka Lawyer Cat Mits formally Asst. Brewer Mits): In full disclosure, I was neither paid nor did I profit from Craft A Brew or affiliates for this brew day post. Its sole purpose is to inspire people seriously interested in craft beer to make the next step into homebrewing. Cheers!

Thanks , I have recently been looking for information about this topic for a long time and yours
is the greatest I have discovered till now. However, what about the bottom
line? Are you positive in regards to the source?
So far, so good. I think the Craft A Brew kit is quite nice. I’m waiting until I post tasting notes of the brown ale before posting my final product review. Initial tasting notes suggest this brown ale is very rich and malty. Will post both tasting notes and a product review soon. Thanks for reading! Cheers!
Pingback: Craft A Brew Brown Ale: Tasting Notes | The Apartment Homebrewer
Pingback: APT Blog: Getting Back on the Brewing Saddle | The Apartment Homebrewer
Have you tasted the brew yet?
Indeed! Here is the link: https://theapthomebrewer.com/2014/07/15/craft-a-brew-brown-ale-tasting-notes/
Also, I’ll post an updated link in this post to avoid future confusion. Thanks for reading! Cheers!
Hi, I am a huge fan of your blog. Again you have done a great job. Very informative post. Thanks for sharing this type of information. Keep sharing.
Home brew store