In an apartment or kitchen setting, sourcing and moving water throughout the brewing process is not an easy task. Water is key to the brewing process, not only for the beer itself (mash, boil, etc.), but also for chilling and cleaning. Indeed, for my homebrewing setup, I have to source and move 25 gallons of water[**] just to produce 5 gallons of beer. In commercial breweries or large homebrewing setups, water is well-sourced while movement is aided by brewing pumps and hard piping, or gravity-fed with brewing sculptures. In the apartment setting, sourcing water is likely through the kitchen sink while moving water is accomplished through faucet or siphon hose technology, not to mention a bit of muscle as well. In this Apartment Brewing Tech post, I show a simple and easy way of moving water needed in the apartment brewing setting through a “makeshift” jet bottle washer water hose.
[**] For those environmentally inclined, my water to beer ratio is 5:1, better than the industry average of 7:1. Check out more info regarding my apartment water usage as well as brewing “water to beer” ratios through this brewing question post linked here.
Idea
 When I started homebrewing, my process was greatly labor intensive. To move water, I would fill up one-gallon plastic jugs or half-gallon growlers to measure out and move water from the kitchen faucet to the brew pot for brewing or a carboy for cleaning and sanitization. Also, I did much hand-shaking-based agitation for carboy and bottle cleaning. Quickly, I realized my process was greatly exhausting as well as somewhat dangerous, especially when using glass. Indeed, new technology was a must.
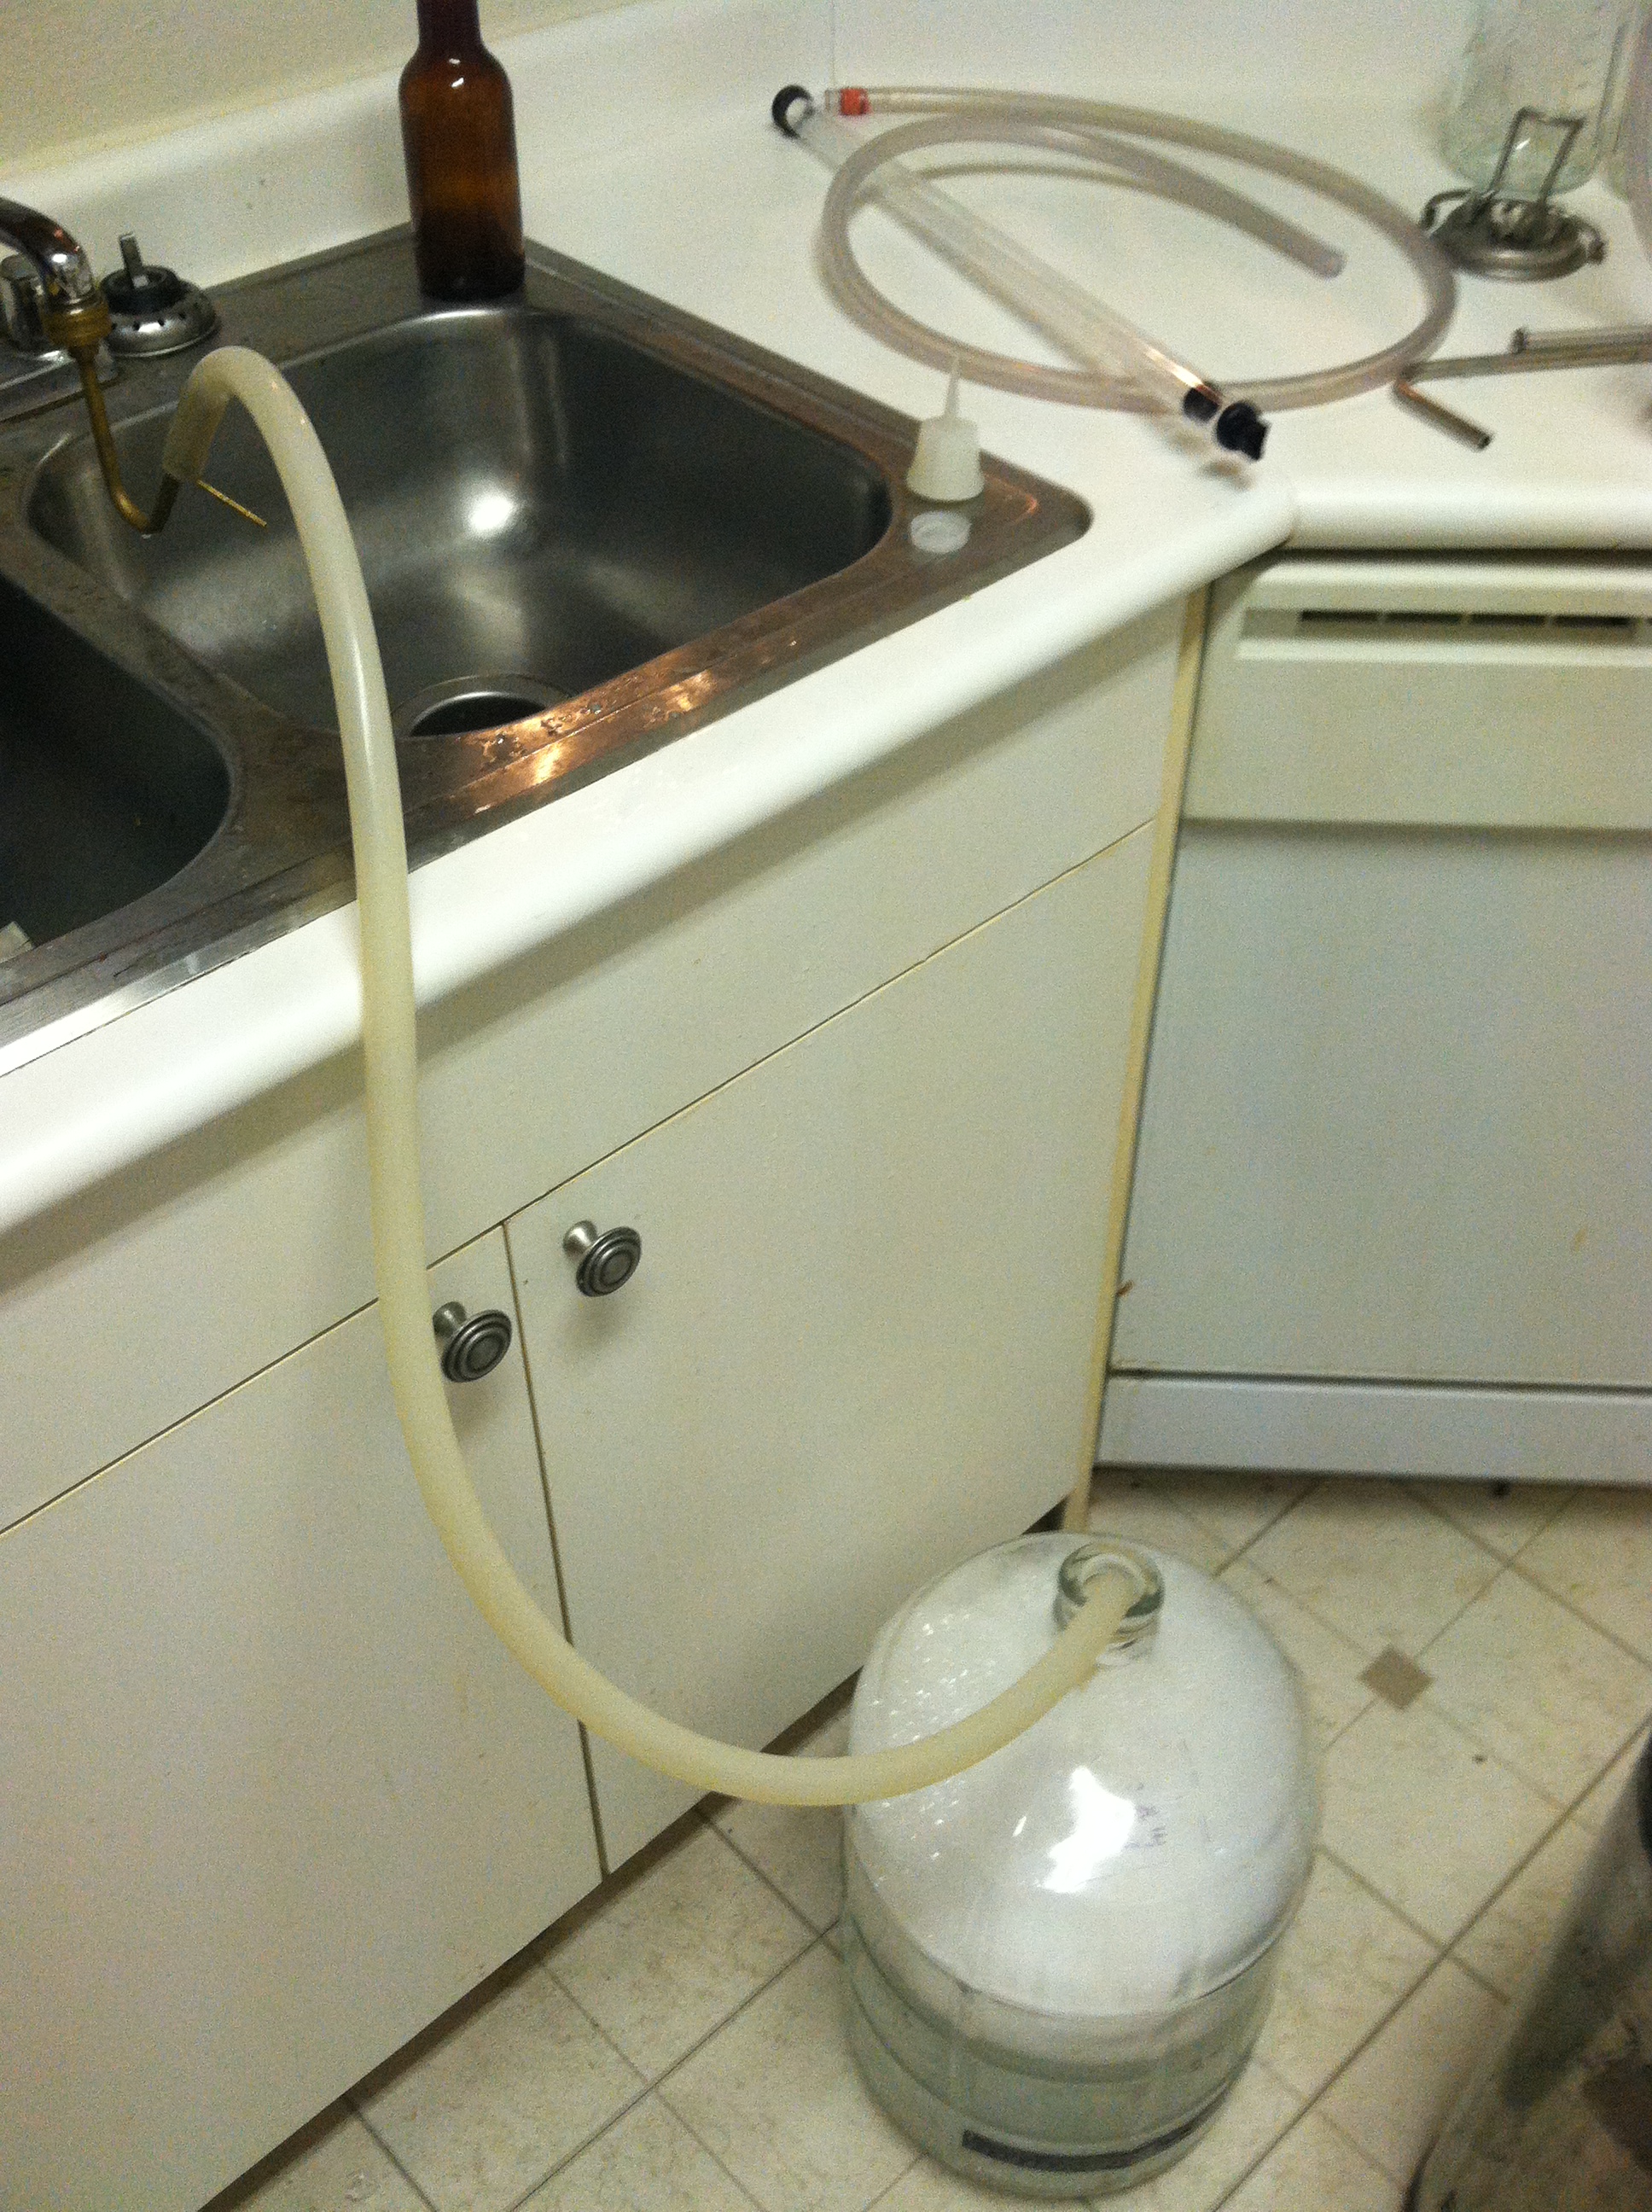
Upon moving to Austin, I purchased a Jet-brand bottle washer. Although fantastic for heavy-soiled bottles and carboys, I found it a pain to remove and reattached every time I need to source water while brewing and filling carboys with water. Then a bright idea came: if I could turn the bottle washer into a hose, then I would never have to remove it throughout the entire brewing process. Additionally, it would make life easier as I could put water directly into the carboys for sanitization and cleaning, instead of piecemeal, one-gallon at a time. Looking through my brewing kit, I came across my mash draining hose. Made of silicone, for high temp processes, it fit perfectly over the bottle washer nozzle. Pushing down on the bottle washer, water jettisoned into the hose and out the other end (success!). Also, not much water leaked out the bottle washer nozzle, making little waste of water throughout the transfer. Additionally, as a bonus, when pushing down for water, the bottle washer would remain in the down position, allowing myself to do other brewing items while filling a carboy (like drink beer!).
Overall, I am very pleased with the makeshift bottle washed-based water hose, and still use it at present during my brewing process. I find it to be very reliable, and since I don’t have to remove my bottle washer through my brewing process, convenient as well. Additionally, the makeshift water hose reuses brewing equipment I normally do not use often. For those interested in trying this out in your homebrewing process, follow the “how-to” details below, which includes parts, assembly, and operation of the makeshift bottle washer water hose. Cheers, and happy brewing!
Parts
[1] Jet bottle and carboy washer. You should find this at your local homebrew shop!
[2] Silicone hose, outer diameter 3/4 inch, inner diameter 1/2 inch, length (non-specific), I use 5 feet.
[3] Kitchen faucet adapter technology. This is for the Jet bottle washer to attach to a standard kitchen faucet nozzle.
Assembly
 [1] Attach faucet adapter to kitchen faucet nozzle end. This step should be fairly straight forward. Attach by threading onto kitchen faucet. If leaky, add some Teflon tape to make a better seal.
[2] Attach bottle washer to faucet adapter. Again, straight forward business. Attach by threading the bottle washer nut onto kitchen faucet adapter. If leaky, make sure the bottle washer nut is tightened fully and the rubber gasket inside the bottle washer is well seated.
[3] Attach silicone hose. Much like putting siphon tube onto a racking cane, insert silicone tubing over the bottle washer nozzle until reaching a hard stop, about 2 inches from the top of the bottle washer end.
Operation
[1] Turn on faucet water. Temperature of water depends on brewing process application.
[2] To turn on hose water, push down on combined hose/bottle washer assembly. Water should rush out of other end of hose. Some water may come out of inlet side. If too much, turn off assembly, and slide hose further down the nozzle is possible. Alternatively, try using rubberband hose clamp technology, detailed in this Apartment Brewing Tech post linked here.
[3] To turn off hose water, pull up on combined hose/bottle washer assembly. Water should stop flowing at other end.
Tips
Don’t walk away while filling carboys with water, you’ll make a giant mess, as I have done in the past. Using towels during the brewing process is a must. Towel based technology is treated in more detail in this Apartment Brewing Tech post linked here.
I hope this may inspire you to use hose technology for either cost and/or time savings during the brewing process. Cheers, and happy brewing!

I dig this idea. Very slick!
One of my better ideas. Necessity is the mother of invention. Let me know if you try it out. Thanks for reading! Cheers!